Friday, October 30, 2009

Still (Horse) Crazy after All These Years

Patrick is occasionally pressed into service for Storey photo shoots, usually for marketing pieces. This photo actually wound up on the back cover of Storey's Barn Guide to Horse Handling and Grooming by Charni Lewis.
Photo © Kevin Kennefick.


After several years of freelancing for Storey, I was hired in 2005 as a full-time editor to work mainly on equine titles. It took 20 years, but I had finally figured out what I wanted to be when I grew up! I’ve been horse crazy my whole life, and though we moved around a lot, I was able to ride on and off all the way through college. But then I got a job and a husband, and we had kids and moved to the suburbs, and I didn’t even think about riding for a long time. But when we moved to the Berkshires nearly 15 years ago, I looked around and saw equine opportunities everywhere. I started taking lessons again and leased several different horses, as I juggled kids, volunteer work, and part-time paid projects.

The only problem after I started at Storey was that I needed to have a horse of my own. I mean, really, what author was going to take me seriously if I didn’t? Besides, as I explained to my husband, after years of playing the field, so to speak, I was ready to settle down. And I knew just the fellow. For the past 18 months, I’d been riding a friend’s extra horse, and we had developed a good relationship. When she told me she had to sell him, I panicked. I didn’t want to buy just any horse; I wanted to buy this one.

When my husband asked what we’d do when I wanted to move on to a “better” horse, I pointed out that I’d stuck with him (my husband, that is) for all these years without wanting an upgrade and I expected this relationship to be a lifelong commitment as well. Patrick (I know, it’s a silly name for a horse, but it suits him) is a nine-year-old Arabian gelding. When I bought him, I sent out an electronic notice to friends and family announcing, “It’s a bay!” He’s got lovely manners and is fun to ride but is enough of a challenge to keep me learning all the time.

We do mostly trail riding, as I still keep him at my friend’s house where we don’t have an arena or even a round pen. But we can go right out onto a network of trails, a winding combination of steep and rocky paths with some great old logging roads. Our New England weather dictates how often I ride, but there’s nothing like being out on a crisp, clear fall day, trotting along a familiar trail with a couple of friends and leaving all our cares behind.

And while I don’t know if being a horse owner makes authors take me more seriously, I’ve worked with a number of wonderful ones over the past few years. I’ve learned a lot from Jessica Jahiel, who writes our Problem Solver series (check out her Web site: www.Horse-Sense.org). Most recently, I’ve had a lot of fun working with Jessie Haas on Horse Crazy and Elise Chand on The Parent’s Guide to Riding Lessons. The former will appeal to horse nuts of all ages, while the latter introduces the world of horseback riding to parents who may be wondering where their own little horse nut came from.

— Lisa Hiley, Editor

Thursday, October 29, 2009

Make Your Own (Unfading) Felt Flowers


Getting ready for the holidays with red and green felted flowers


Mascot for the night: Chico!

I have always loved flowers. From the time I was a little girl, flowers from my father, picking wildflowers in humid Western New York summers, and growing my own always brought joy, beauty, and fragrance. But all good things end, and flowers always die. As a believer in feng shui, I shy away from fake flowers, but since reading Sweater Chop Shop by Crispina ffrench, I have become taken with felt garden flowers.


Storey Creative Director Alethea Morrison profiles her fashionable homemade clips


Sarah Guare models her fabric creations

The basic technique for making these fabric flowers (a dozen in just 90 minutes) is so simple anyone can do it. Techniques can be highly refined and detailed for those who want to embellish their buds into hair pieces or pins, but I began making them with the simplest technique.

You will need:
  • A ruler
  • A pair of wire cutters
  • 8 yards of 20-gauge galvanized steel wire
  • Scraps of various floral-colored felted wool knits from other projects
  • Sharp fabric scissors or a rotary cutter and pad
  • A handful of assorted buttons
  • 12 narrow strips of green fabric or green seam binding, 16" long
  • White craft glue
Optional:
  • An electric drill
  • 24-gauge galvanized steel wire (see Flower Variations in Sweater Chop Shop)
  • Small spring-loaded pliers
Once the wire is cut into 24"-long pieces, bend them in half. Be creative with the shapes of fabric used. Petals can be constructed from squares, circles, triangles, and strips of varying sizes. Shapes can range from ½" across to 2½" or even 3" across if the fabric has enough body to hold itself without looking floppy or wilted. Bright shades and contrasting colors make for unique designs. Stacking two or three buttons first will coordinate well. At a recent Storey felt-flower-making party, some folks discovered that buttons on the bottom of the “leaves” gave buds an extra boost and even made the fabric pucker.

Wrap the wire with green fabric, and use the end of a drill to tighten it (twisting by hand also works). After tightly securing it, glue the tip and hold. A bunch of designs make for shabby chic creations for home or office or to give away. Tall, short, garland — the more felt flowers you make, the more inventive your designs become. Get started now, and once the holidays are present, it will be time for those extra green and red fabric remnants to be used in holly and poinsettias and, finally, home-for-the-holidays wreaths.


Publicity team Alee Marsh and Michelle Blackley offer bunches of blooms


Jess Richard, publishing administrator and Jessica Armstrong, senior designer, were especially crafty


Xavier helps Kathryn Remillard, office coordinator show off her woolen wonder

— Michelle Blackley, Senior Publicist

Wednesday, October 28, 2009

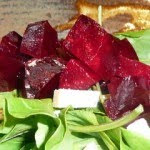
Amy Cotler: Arugula, Beet and Blue Cheese Salad

Simple, classic and local — all from the farmers market yesterday. I roasted the beets while cleaning this morning, so they’d be ready to complete our dinner when we returned this evening. I hate to clean and tend to reward myself with food. The smells of simmering apple sauce or the happy longing for food finished, such as roasted potatoes or the beets here, move me along. This salad was accompanied with my neighbor’s fresh eggs, fried and topped tomatillo salsa. (It’s frozen in ice cube trays, as in my post a few weeks ago. Then it’s defrosted in the microwave, a cube’s worth at a time.)

Serves 2

2-4 beets*
2 generous handfuls of arugula, washed
1/4 pound of anything in the blue family (or goat if you prefer)
white or red balsamic vinegar
olive oil, preferably fruity in flavor
kosher or sea salt

1) Wrap the beets in foil and roast in a 400 degree oven until they can easily be pierced with a knife. Small beets may roast in as little as an hour, larger for as long as 2. Cool and peel.

2) Toss arugula in olive oil and a touch of salt, just to coat. Divide between two bowls.

3) Peel and cube the beets. Toss with vinegar, just to coat, and a touch of salt, using the same bowl used for arugula. Center or sprinkle beets over the arugula.
Sprinkle salad with the cheese. Serve immediately.

Variation: If the cheese is soft, spread it on a warm toasted bread.

*Tip: Roasted beets/Beet Greens
Roasting beets concentrates their flavor, making them irresistible—the dessert of the vegetable kingdom. I like them so much, I often throw a bunch into the oven while I’m making breakfast or dinner, so I can have them around to eat later. If you like them, roast lots of them, then store in the fridge for up to 5 days. In this recipe the tops weren’t available because of the freeze, but earlier in the season you should use the green tops. Discard stems and any tough spines. Bring water to a boil, add salt and plunge in leaves for 2-5 minutes, until tender. Drain. When cooked, but still slightly warm, dress with salt, olive oil and fresh lemon juice Serve immediately.


Any local cheese in the blue family is great with pears.


A longtime advocate of local eating, Amy Cotler is the founding director of Berkshire Grown, food initiative that received international recognition as a model for local food advocacy. She now consults, teaches, and lectures on food and farm-to-table issues. She worked as the Web food forum host for The New York Times, and her food articles have been published in numerous periodicals, including Fine Cooking, Kitchen Garden, Cook’s, Family Fun, Self, Gastronomique, and Orion. Her five cookbooks include The Secret Garden Cookbook, My Little House Cookbook, and Fresh From the Farm: The Massachusetts Farm to School Cookbook, which is available free online. Amy has developed close to 1,000 recipes, including many for the revision of The Joy of Cooking. She’s taught at the Institute for Culinary Education and The Culinary Institute of America, where she also researched and wrote teaching text for their professional cookbook. She lives in western Massachusetts. Reach her at www.freshcotler.com.

This post was originally published on her blog, Amy Cotler, The Locavore Way.

Tuesday, October 27, 2009

Brenda Kipp: Views from the Heartland


Fall is more than just a transitional season. Fall is my favorite time of the year. I eagerly anticipate the first signs of autumn — trees and bushes turning colors, chrysanthemums beginning to bloom, and the air turning cool and crisp.

For some, autumn is merely a bridge from summer’s heat to winter’s cold, but fall should be enjoyed for the rich, vibrant colors it offers.


For those of us who like to spend time out in the yard, autumn can be more than just raking leaves and preparing the ground for winter. It can be a time to enjoy the season to its fullest.

In recent years the popularity of ornamental grasses and colorful bushes have added beauty to residential and commercial landscapes long after spring and summer flowers are gone.


If you are contemplating adding these and other autumn-loving plants to your garden but don’t know where to begin, two books from Storey will help you get started. Foliage by Nancy J. Ondra and Fallscaping by Nancy J. Ondra and Stephanie Cohen give you expert advice on which plants are best for your yard and the climate in your area.

In Foliage Ondra describes different varieties of plants in vibrant reds, brilliant golds, subtle silvers, rich purples, and amazing multicolors. The book is divided up into leaf textures — spiky, bold, medium, fine, and lacy — to help you decide what plants you would like in your garden.

An excellent companion to this book is Ondra and Cohen’s book, Fallscaping, which covers ornamental grasses, seed- and berry-producing plants, annuals and perennials, vines, shrubs, and trees. The authors provide advice on planning and designing your garden, creating a new garden site, fall planting and transplanting, pruning, preparing plants for winter, container gardening, improving soil, and caring for your lawn and tools.

With these two books at your disposal, there’s no excuse not to have a beautifully landscaped yard bursting with color in the fall. My yard wouldn’t be able to contain all the plants I would like to have from the pages of these books, but I’m getting excited about visiting one of my local nurseries to check out which of these plants would work best for my yard.

Enjoy the autumn season!

A native Kansan, Brenda Kipp loves wide-open spaces and the history of the Old West. She’s a freelance writer and former editor of Capper’s magazine. She continues to work for Ogden Publications (publisher of Capper’s) as a circulation specialist. Her hobbies include reading, writing, genealogy, traveling, cooking, gardening, and spending time with family and friends. She lives in Topeka with her three cats.

Photos by Brenda L. Kipp, Rock Garden in Gage Park, Topeka, Kansas

Monday, October 26, 2009

Better-than-Store-Bought Yogurt

As I wrote in a post a couple of weeks ago, I recently attended a cheesemaking workshop with "cheese queen" Ricki Carroll. While I have a zeal for dairy products, especially sour cream and cheese, I've never really liked yogurt much. What I didn't know until that class is that you can make yogurt with a multitude of different flavors and consistencies, and by flavors I don't mean vanilla or strawberry. The type of bacteria culture that you use radically changes the taste, from sweet to tangy to downright sour. In Ricki's class we sampled about four different yogurts, and I was delighted to find that I love, I crave, Bulgarian yogurt, which has a flavor akin to sour cream.

I have two books on how to make cheese and dairy products,
both from Storey, of course: Ricki Carroll's
Home Cheese Making
and Kathy Farrell-Kingsley's
The Home Creamery.
Photo by Susie Cushner

Ricki cited Bulgaria as being the home of the first yogurt. In doing a spot of research for this post, I found a lot of conflicting information. Some Bulgarians will stake their lives on the fact that they invented the stuff, but a lot of sources credit Turkey with the discovery. In any case, a lot of cultures in Eastern Europe and Western Asia have their own varieties (some as thick as curds) and have different names for it, of course, in their own languages. In the English language we've adopted the Turkish name "yogurt," so maybe that's the source of confusion. But it's just an offhanded theory; I'm definitely not taking sides.

Yogurt is incredibly easy to make and a great place to start if you have an interest in making your own dairy products. I've made my own sour cream, which is even easier, but the taste isn't so remarkably different or better than what you buy off the shelf, so I haven't been motivated to keep it up. To make my batch of yogurt, I bought a Yogotherm (available at cheesemaking.com), which is basically a small airtight pail that can fit into a foam-insulated caddy while you're waiting for bacteria cultures to turn your milk into yogurt. As my base, I bought a half-gallon of raw milk (meaning unpasteurized and unhomogenized) from a local farm, though you can use supermarket milk as well.

Basically, all I did was heat the milk to 180 degrees (which meant I also needed a dairy thermometer), then put the pot in a sink of cold water until it cooled to 110 degrees. Next, I stirred in my starter, which is a sanitized name for bacteria. I used Bulgarian starter that came dried in a packet, but you can stir in already-made yogurt instead. Storey editor Sarah Guare recommends Stonyfield Farms, as they change their starter regularly so it doesn't lose its strength. If you go that route, use a half cup of yogurt to two quarts of milk. I poured the mixture into my Yogotherm and waited five or six hours, and it was done and ready to store in the refrigerator! I've been eating it every day for breakfast, mixed with ginger-flavored granola and raisins. I've also had it as a snack, mixing it with a teaspoon or two of jam.

Yogurt is regularly listed as a superfood in health articles. It's nutrient dense, packing high levels of protein and calcium into small quantities. It's easy to digest. Even lactose-intolerant people can often eat yogurt with no side effects, since the live active cultures contain lactase, the enzyme that lactose-intolerant people lack. Yogurt literally acts as medicine for yeast infections and gastrointestinal problems because it contains probiotics, beneficial bacteria that promote and protect your health. Some studies indicate that yogurt can lower your cholesterol, and the low-fat and nonfat varieties may promote weight loss.

Making something myself that I could have bought in a store gives me a sense of accomplishment, but making something myself that I couldn't have bought in a store brings satisfaction to a whole new level. Bulgarian yogurt = delicious, nutritious, and attainable (for me) only at home.

Alethea Morrison, Creative Director

Friday, October 23, 2009

Sue Weaver: Riding the Ox

A man riding a water buffalo in Manila

While writing my upcoming Storey book, Have a Cow, I’ll also be doing something I’ve dreamed of but never done before: training a steer to ride. A few years ago I did the groundwork with Frazer, a Highland steer, but life got in the way, and I didn’t finish the task. Frazer went to a home with other riding steers, and I was back to square one.

The concept tickles my fancy because it seems unique, yet ancient art and archaeological evidence suggests that people have ridden cattle almost since humans first domesticated the fierce wild auroch 6,000 to 8,000 years ago in in the Fertile Crescent, Africa, and the Indus Valley of India and Pakistan.

Separate bovine domestications occurred when water buffaloes and yaks were tamed around 3000 BC in the Indus Valley and 2500 BC in China, respectively. Both were used for riding and still serve that purpose in their Asian homelands, where they also provide draft power, meat, and milk.

A surprising number of people saddle up cattle for fun. The International Riding Steer Association has members as far away as England, Sweden, and Australia. Americans are especially fond of riding longhorn steers using Western saddles and nose bits that pierce the animal’s septum with rings for reins on either side. They show their cattle in performance classes at Longhorn shows, participate alongside horses in trail rides, and host cattle saddle clubs in some locales, like the one featured in this short video shot at a Western parade. One trainer even taught his steer to cut cows in the manner of a trained cutting horse.

A riding ox in Angola, 1910

But cattle are ridden in English gear, too, like Hazel, a pretty riding cow ridden by her young Swiss owner, and the steer in this vintage photo above, taken in Angola, circa 1910.

I’ll be training a Jersey-Holstein steer named Aiah and his pal Ludo, the water buffalo calf, and I’m mulling over what type of gear to use on the boys. I don’t want to pierce their noses in the manner of longhorns or water buffaloes, which are guided by a thong through a hole in their septums, so I’ve been contemplating a mechanical hackamore (a bit without a mouthpiece) of the type designed for horses. A few days ago I stumbled across a YouTube video of two girls using such a setup to train their longhorn steer, Chevy. Now I’m convinced!

Ludo, October 1, 2009

Ludo’s back is very broad and not at all bony, so one of my lightweight Western saddles built on a wide Arabian tree may ultimately fit him when used with a breast collar around his chest and a crupper (like the one Hazel is wearing in the Swiss video) under his tail to stabilize it on his back. Because of his dairy heritage, Aiah’s back is far more angular than Ludo’s, so an English saddle with an adjustable tree is likely in his future, and he’ll need a breast collar and crupper, too.

Ludo and Aiah, September 28, 2009

Both of my boys lead, stand patiently when tied to the hitching rail, and (usually) let me pick up their feet. I planned to start by training Aiah, since he’s six months older than Ludo, but a streak of Jersey friskiness (and his long, sharp horns, with which he’s been known to playfully poke my derriere) makes me think it’s probably wiser to gain experience with much-mellower Ludo before I start with Aiah.

However, though he’s a big, husky boy, Ludo is only one year old — old enough, say the longhorn riders I’ve asked, but I am not a featherweight, so I’m not 100 percent convinced. I’ll start him sans saddle (as water buffalos are ridden in much of the world) to cut back on weight. I’ve also beefed up my exercise program (pun intended) and cut fat grams and calories to shed a few pounds and save wear and tear on my buffalo’s back.

A good thing is that water buffaloes mature much faster than horses, and they have incredibly strong, dense bone. And nobody ever set a speed record riding water buffaloes — their walking pace is 1 to 3 miles per hour (these are “stop and smell the roses” types of riding beasts) — so stress is not an issue there.

So let the games begin! I’ll blog about our progress from time to time, and I’ll be chronicling the boys’ training in the book.

Am I crazy to do this? Maybe. But I’m really looking forward to riding these guys!

Sue Weaver sold her first freelance article in 1969. Since then her work has appeared in major horse periodicals, including The Western Horseman, Horse Illustrated, Chronicle of the Horse, Flying Changes, Horseman’s Market, Arabian Horse Times, The Appaloosa News, The Quarter Horse Journal, Horse’N Around, and The Brayer. She has written, among other books, Storey’s Guide to Raising Miniature Livestock, The Donkey Companion, and Get Your Goat! to be published in 2010. Sue is based in the southern Ozark Mountains in Arkansas.

Thursday, October 22, 2009

One-Pot Autumn Chicken for Families on the Go this Fall

This quick recipe from The Good to Go Cookbook by Kathleen Cannata Hanna is perfect for anyone trying to wedge a homemade dinner between soccer practice and dance recitals during this busy time of year.

Autumn Chicken
This is a great dish for the fall, when sweet potatoes are at their peak.

Prep time: 3 minutes 
Cook time: 30 minutes 
Yield: 4 servings

2 tablespoons vegetable oil
4 boneless, skinless chicken breast halves (1–1-1/2 pounds)
1 cup low-sodium chicken broth
2 teaspoons Italian seasoning
1 large sweet potato, peeled and cut into 1/4-inch discs
1 cup frozen green beans
Salt and pepper

1. Heat the oil in a large skillet over medium heat; add the chicken, and cook for 5 minutes per side.

2. Add the broth, seasoning, potato, and green beans; bring to a boil and reduce the heat to low.

3. Cover and simmer for 20 minutes or until the vegetables are tender. Season with salt and pepper to taste, and serve.

QUICK TIP: You can cook this dish all at once in a slow cooker, as well.

Photo by Kristy MacWilliams

Stephen Philbrick: Picking Up Sticks, or Stacking Firewood


Now here’s the deal: I’ll give you some tips and the obligatory classic quote from a crusty New Englander, but I’ll also tell you the truth about stacking firewood.

Here it is:
In Walden,
Henry David Thoreau said, “Every man looks at his woodpile with a kind of affection.” I’ve been stacking cordwood for the last forty autumns, and to tell the truth, it isn’t my favorite part of heating with wood.
Saws are loud;
Felling’s sexy;
Limbing takes care;
And bucking is real work.

Mauls are like family members (solid, reliable, long-lived, likely to fly off the handle only if you don’t know how to treat them);
Axes are keen;
Splitting is the measure of strength and skill, wile and aim, that we like best;
But nobody in my family really likes to stack wood.

They say confession is good for the soul, but this admission just makes me depressed.
I am, after all, indoors on a perfectly nice afternoon writing a piece about stacking wood before a deadline comes, rather than actually stacking the stuff before the real deadline: when snow flies. (And when will that be, eh?)
But you can’t live on the sawtoothed ragged edge forever, and nothing is worse than digging through the depth of snow and the layers of ice to free up some frozen firewood, so okay, okay, let’s stack some cordwood.
First: use the right wood. What we want is hardwood — not trees with needles or cottonwood or other types of poplar, if you can help it.
Hickory holds the most heat, and so does ironwood, but ironwood is scarce, and most hickory is a little south of here. In the neighborhood around Storey, we have:
Oak (red mostly, some white)
Maple (sugar is better than red; red is also called swamp; sugar also answers to “rock”)
Confused? Sugar, which holds 33 percent more heat, is likely to have shaggy bark and yellow or orange leaves in the fall. Red maple has, well, red leaves and red twigs, too.
Ash (splits easily and dries quickly)
Beech (gray bark, looks like elephant skin, burns well)
Birch (yellow and black birch burn a lot hotter than paper birch)
Cherry (when it’s straight-grained, it splits like a dream; moderate amount of heat)
Wood should be at least a year old, meaning the tree was felled and the wood split last fall or before. This winter we are going to burn two-year-old wood. It is a luxury to be this far ahead, but the luxury came from many hours with saw, maul, and pickup truck.

How can you tell the wood is aged? Here are some tips:
  • It is about half the weight of fresh-cut wood.
  • It has cracks, called “checks,” in the face of the sawn ends.
  • When you smack two pieces together, they should not “thud”; they should ring like two baseball bats.
  • Smell: green wood, especially oak, is much more pungent than dry stuff.

This may seem to be an obvious caution, but make sure that the wood is not too long for your stove. This is particularly important if you are buying truckloads of the stuff. When the firewood guy tells you what lengths he is selling, don’t guess and don’t try to remember — measure your stove.

Now, for the stack:
  • The three basics are off the ground, under cover, and safe.
  • The goal is to keep the wood dry, with air circulating through the pile. So if you can’t keep your wood indoors, put a tarp or some old sheet-metal roofing on top. If you use a tarp, cover the top of the pile only. Many is the newcomer to the country who has wrapped his or her woodpile up tight as a tick in plastic, and great is their dismay when the wood is dripping wet from condensation. The wood's like you: it’s gotta breathe.
  • Off the wet ground is good, too. If you can stack on top of wood pallets, that’s fine. Otherwise “stringers” work well; stringers are two boards or saplings laid out parallel to each other and closer together than the piles of firewood are long. You lay the firewood across the stringers, which boost the wood off the ground, encouraging that vital circulation of air.
  • For the same reason don’t obsess about stacking perfectly tight. You want to be able to see a little bit of daylight through the pile. Mark Twain wrote about some wood dealers, “Those crooks had it stacked so you could throw a dog through it anywhere.’’ That’s a little too loose.
  • Finally, safety: the woodpile should not fall on you. Keep it level, and brace the ends. If possible, build your woodpile against a post, a tree, or something else vertical and strong. If none is available, you’ll have to “crib” the ends. Cribbing is making a freestanding tower of wood at the end of the row by alternating the directions of the layers of wood. The first layer is placed at right angles to the direction of the row; the next layer in the same direction as the pile; the third layer at right angles, and so on. Cribbing will steady the pile surprisingly well.
  • To diminish the risk of avalanche, it is important not to stack too high. Of course, the more convenient to the stove or fireplace (but at least 3 feet away!) the better.


This backyard woodpile uses old pallets in lieu of stringers. At the right end of the stack, a new course of cribbing is being started. Photo by Ilona Sherratt from The Backyard Lumberjack.

All this talk about woodpiles has made me feel better about the process.
When the large is too huge, the small too sharp, or the eternal too damn long, it is good to pick up sticks. We have found old maple spouts from sugaring, cherry pits stored by chipmunks, and skins shed by garter snakes in our woodpiles.
What about a pot of gold, you ask? That’s the woodpile. By February you’ll understand.

Farmer, poet, shepherd, and minister, Stephen Philbrick has cut down thousands of trees and stacked hundreds of cords of wood. He still has all his digits but does have a gouge in his leg that taught him an invaluable lesson: Never leave home without your chaps! The author of The Backyard Lumberjack and three published books of poetry, Stephen is a graduate of Brown University and minister of West Cummington Congregational Church. He lives in western Massachusetts, where he manages 120 acres of woodland. Top photo by Melanie Jolicoeur.

Wednesday, October 21, 2009

Things are Bigger in Texas

Michelle Blackley, Amy Butler, Rebecca Yaker and Patricia Hoskins

Things are bigger in Texas, and Quilt Market 2009, from October 10 to 12 in Houston, was no different. Thousands shuffled through the George R. Brown Convention Center and were bombarded with bobbins, textiles, and how-to books. Highlighting two of the days were signings with Rebecca Yaker and Patricia Hoskins, celebrating the release of their new book, One-Yard Wonders. It's the only book of its kind (with 101 projects), and crowds rushed the Notions and Checkers table for advance copies.

Signing and demonstration at Checkers

These charming fabricaholic authors showcased projects from the book, from apparel to accessories, from plush toys to pet beds, from baby items to bags, and from home dรฉcor to Happy Birthday banners, all made with just one yard of fabric. Outfitted with the desire to have a unique style, Yaker and Hoskins are giving the novice and most accomplished sewers alike the biggest book of sewing projects ever — 101 projects to make and customize.

Celebrities of the craft world, such as Amy Butler of Amy Butler Design, were thrilled to see their fabrics featured in One-Yard Wonders. Amy took a copy of the book home to Ohio for her personal collection.

Patricia Hoskins, Nicole and Phillip Alexander, Rebecca Yaker

Just in time for the preholiday rush, One-Yard Wonders promises gift-worthy solutions for that stash of irresistible fabric-store buys and leftover scraps. At last it’s time to stop storing and start sewing! Great fabric should never hide in a closet. One-Yard Wonders offers an original collection of designs with hip, contemporary flair, 101 projects that can be completed in a few hours, using the most desirable patterns for crafty sewers and featuring a wide range of fabrics from today’s designers. Sewing aficionados Yaker and Hoskins solicited these fabulous fabric projects through a global online campaign, choosing easy yet sophisticated patterns for all sewing levels. One-Yard Wonders includes everything you need. For each project there is a full-size pattern piece if needed, easy step-by-step instructions, and simple illustrations. Templates are also included wherever needed, and full-color photos of the finished product and handy tips on special techniques are there for every project. All any crafter needs to do is dig into the stash and add her own unique flair.

As part of the celebration surrounding the release of One-Yard Wonders, Storey is offering One-Yard Wonders Yard-of-the Month Sweepstakes. For a full year the lucky winners will receive one yard of fabric every month, along with an extra gift. Visit www.storey.com/oneyardwonders.php for more information. Alexander Henry Fabrics will be donating fabulous pieces of fabric throughout the year, and the company was thrilled to see a final copy of the book at Quilt Market.

Dust off the sewing machine, forget about high-priced fashions, and start crafting one-of-a kind creations!

— Michelle Blackley, Senior Publicist

Photos by Gene Pittman

Wrapped In Wool

This weekend was the New York Sheep and Wool Festival in Rhinebeck, one of those fiber pilgrimages that you put in the calendar a year ahead of time, along with the Maryland Sheep and Wool Festival in May and Clara Parkes's Knitter's Review Retreat in November. Imagine a space the size of about ten football fields filled with barns and tents full of sheep, llamas, alpacas, goats, and rabbits and their corresponding yarn! Here are some bad pictures of very cute animals:


One of the reasons I was there this year (other than smelling the wool, which is intoxicating to me) was the Storey Publishing team's contribution to the Keep the Fleece initiative, a fund-raising arm of Heifer International. Linda Cortwright, publisher of Wild Fibers magazine and a superwoman in her own right, organized Keep the Fleece not only to make it easy for people to donate money to Heifer International but to entice knitters to make "The World's Longest Scarf," with donations to be made for each knitted inch. Here is our publisher, Pam Art, tagging scarf sections to be knitted together by a team of intrepid needle wielders.


I actually didn't end up buying any yarn this year (a first since I've been coming for the last seven or eight years!) because I keep thinking that when I shuffle off this mortal coil, I'll be buried with all the yarn I have yet to knit, no matter what incredible age I live to. And that coffin will have to be the size of a large pleasure boat to hold it all.

But I go because it's great to see what new stuff is out there in the world and to meet the people who create and craft with that beautiful stuff. I'll give a shout out to Red Maple Sportswear, who make and sell beautiful alpaca garments and accessories; they were one of the sponsors of the Wild Fibers dinner and offered a coupon for the willpower-challenged, like me, to their booth of delights. I got a gorgeous alpaca wrap in a pale sea green that I'll keep at my desk for chilly meetings in drafty conference rooms and to remind myself of the joy that I get from the craft of fiber-making.

Amy Greeman, Director of Publicity

Tuesday, October 20, 2009

Heather Smith Thomas's Notes from Sky Range Ranch: How I Became a Cow Person

Watching cows on Grandpa's farm, when I was 4 years old

I became fascinated with cows at an early age. My father was raised on a small farm in southern Idaho, then became a Methodist minister. He still loved the land and the animals and took my little brother and me to the family farm for visits. I remember those trips to “Grandpa’s farm” as a small child — and being fascinated by the cattle grazing there.

My first heifer, whom I named Bovina

When I was 4 and 5 years old, my parents left me with a farm family several times when they had to travel. I tagged along with the big kids to do chores and feed cows, and one of my best memories is sitting in the feed bunk by the barn, where the cows were eating hay. I loved the sweet smell of their alfalfa-chewing breath and their inquisitive faces as they took wisps of hay from my hands with their agile tongues.

When I was 10 my parents acquired a small acreage in a canyon up a creek in central Idaho and 2 years later started buying the neighboring ranch. This was a dream come true, because now our family had cattle and horses. During my teen years I worked on the ranch — irrigating our hayfields with water ditched from the creek, building fence (my brother and I dug lots of postholes!), riding range to look after the cattle — to earn some cows of my own. The annual calf crop from my small herd helped pay my way through college.

Dad’s ranch was a small “cowboy” outfit, with very few facilities for handling cattle. We looked after our herd on horseback when they were on summer range in the mountains behind our place. The cows calved in March and April in the field next to our house, and we hoped for good weather because we didn’t have a barn. We herded them into our corral when we had to catch them, roping the calves for branding and vaccinating.

Digging postholes: As a teenager I earned my own cows working on my dad's ranch.

I enjoyed helping Dad with the cattle work. It was difficult sometimes, as when helping a heifer calve or trying to treat a sick cow. We didn’t have a headcatcher or squeeze chute for restraining them. One spring in the late 1950s was miserably cold and windy. Many cows had sore, chapped teats and were kicking their calves — not letting them nurse. We had to rope some of them and snub them to a post in the corral. I held the rope (dallied around the post) while Dad milked out the cow (trying not to be kicked) and put bag balm on their sore teats.

There was also the anguish of losing the ones we couldn’t save, such as when there were birth problems out in the field and we were not quick enough to find them in time or the bull who ate poison plants along the creek. There was the weak calf with diarrhea that we brought into the house and tried to keep warm on a bed of rags in the basement. We didn’t know enough, back then, about supportive fluids and proper medical treatment; many of the scour “bugs” we contend with today were just starting to appear in our area at that time. We lost that calf. I sat beside it while life slipped away, agonizing over its death, vowing to become a better “cow doctor” when I grew up.

I also vividly remember my first difficult calf birth. My parents were at a meeting downtown, and just after dark I went out to the corral to check on a heifer that was due to calve. She was in hard labor, lying flat on her side, groaning and straining. The amnion sac had appeared with two little hooves in it, but the heifer made no progress. I sat beside her, suffering with her. Pale moonlight glistened on the amnion sac as the little feet tentatively entered the world but could come no farther.

My dad and one of our first bulls, named Sifax

I realized she needed help, so I ran to the house and tried to phone my parents — without luck. I hurried back to the corral and sat by the heifer for a while but didn’t know how to help her. Finally, in desperation I ran back to the house and phoned a neighboring rancher. I was young and shy, and it took a lot of courage to ask him to help, but the heifer’s plight made me brave. The rancher came, and we pulled the calf. That baby survived because of the intervention of a timid child. I was so proud and happy; I felt like a fairy godmother to that calf.

From those early experiences with cattle, my lifework took shape. Learning everything I could about cows, their various problems and illnesses and how to successfully treat them, became one of the driving forces of my life. I went to college and graduated with a degree in English and history because I couldn’t become a veterinarian (vet schools were not accepting women at that time), but I was unhappy away from my cows. I considered going to another college and taking undergraduate veterinary courses just for my own benefit, but instead I married a rancher. Since 1966 my husband Lynn and I have been intensely involved with cattle on our mountain ranch, part of which was the original home place my Dad got in 1955, which he called Sky Range Ranch. Here, on Withington Creek, Lynn and I have now been raising cattle (and a few horses) together for nearly 44 years.

To be continued . . .

Heather Smith Thomas raises horses and cattle on her family ranch in Salmon, Idaho. She writes for numerous horse magazines and is the author of several books on horses and cattle farming, including Storey’s Guide to Raising Horses, Storey's Guide to Training Horses, Stable Smarts, The Horse Conformation Handbook, Your Calf, Getting Started with Beef and Dairy Cattle, Storey's Guide to Raising Beef Cattle, Essential Guide to Calving, and The Cattle Health Handbook.

Monday, October 19, 2009

Sign Painting DIY

This summer my mom fulfilled a lifelong dream of owning a cottage getaway. She bought a little cabin in the woods near a couple of lakes, and she and her husband have spent every free moment transforming it into a cozy retreat. When I first came to see it, I was awestruck by the handmade signage that homeowners put up at the intersection of the two neighborhood roads. Each taken by itself didn't amount to much, but as a collection they look really beautiful. For a housewarming gift I told my mom I would make her one to add to the group.

These signs direct visitors to the family homes
they've come to visit. My new addition is
the yellow one at the top left. My favorites
are "M/M" in blue and white (middle, left)
and "Ayers" in the fish shape (top right).

Photo by Mars Vilaubi

I already had the paint I wanted to use: some Old Fashioned Milk Paint. The Old Fashioned Milk Paint Company (www.milkpaint.com) reproduces the paints that were used in Colonial America in really incredible colors: vivid, rich hues that look like they've been filtered through a grey sky. Milk paint lays on very thin, with an unusual matte finish that almost looks more like a stain than a paint but with really rich pigment. As they note on their Web site, it is also biodegradable, with no VOCS, HAPs, or EPA-exempt solvents added. And they add, though it will spoil, just like whole milk, it is also as safe as drinking whole milk.

This is the second sign I made, for the entrance to the driveway.
Photo by Mars Vilaubi

For the body of the signs, we had some pine-board scraps that my husband Mars cut into the shapes I wanted. After applying the milk paint, I transferred the letters. To do this I printed the words out on the computer, then took a pin and made holes at every edge of every letter in approximately 3 mm increments. I taped the paper to the sign in the right position, then vigorously rubbed charcoal over the whole thing.

This photo shows the printed paper taped to the sign
before I've applied the charcoal. It would have been better
if I hadn't trimmed the paper so close to the letters and
the whole sign had been covered. The charcoal dust
tends to drift where you don't want it.


I removed the paper, and neat little charcoal dots appeared in the shapes of the letters, providing a template for me to use while painting.

Using these applied dots as my guidelines,
I painted on the letters with black house paint
and a simple art brush.


Though I was able to capture the historically based color of the milk paints, my choice was impractical on the level of durability. Since the signs will live outdoors, I decided I needed to coat them with spar varnish, which is very shiny and thick and took away the lovely matte finish and stainlike quality of the paint.

Alethea Morrison, Creative Director

Friday, October 16, 2009

This Clyde's for You

On the road with Team Budweiser
All photos by Mars Vilaubi — thanks, Mars!

The canvas tent roof rattled, the plastic flaps lifted in the bitter breeze, but under the big top the 10 horses stood solid and stolid. No wind on earth could blow these equines away or even ruffle a single ear. Several were asleep, eyes half closed, lips slack and rubbery, lying down or standing with one huge hoof tipped up; others snuffled in their mangers or gazed at the gawkers of all shapes and sizes.

Gentle giant

You’ve seen the Budweiser Clydesdales on billboards and in TV ads, but they are truly monumental in person. They are famous for their majesty and their mildness, and they’re camped here in our parking lot awaiting a performance in the Fall Foliage Parade (a long-time North Adams institution). The 10 horses and six handlers travel in four supersized tractor-trailers with gigantic photos of the team along the sides; when not performing they hang out in this billowing white tent receiving visitors.

The MASS MoCA staff temporarily closed the parking lot
to create a horse haven.

The Budweiser people have set out a welcome mat, literally, with Adirondack chairs and a faux-harvest landscape of cornstalks, hay bales, and chrysanthemums. I sat in one of those chairs for a while and witnessed a procession of North Adams visitors, curious to see these equine legends. Seniors came with walkers and canes, teenage girls drifted and hovered, little kids danced around, and one mother held her six-month-old baby as high as she could to meet the gaze of Ringo.

Young and old were enthralled by these statuesque yet placid animals.

Some had never seen a horse, certainly not of this size; others said they had raised Appaloosas or Arabians. One man in a baseball cap told me he remembered the animal-power era: He grew up on a North Adams dairy farm where a “workhorse” pulled the wagon carrying fresh milk to customers every morning at sunrise.

Once in their presence you want to stay and soak up the calm and strength of these gentle giants. I sketched their bodacious curves and decided there is really nothing more exquisite than the shape of a horse’s ear.

This, I believe, is Ben, or it might be Stewart or maybe Chip.

The camera couldn’t capture all ten horses in their box stalls, but here are their names, for posterity: Ringo (contemplating the mountains like a tourist); Dillon (comatose); Don (nose in manger); Barry (easily resting his head atop the seven-foot-high steel partition); Chip (munching hay); Stewart (lying down and causing great consternation that he might be dead); Ben; Jack; Buck; and Greg. One woman approvingly noted the name Stewart and said, “They should all have Scottish names.”

The curvaceous proportions of these steeds are due to great musculature developed over centuries of pulling ploughs near the River Clyde in Scotland. But these “heavy horses” were descended from chargers, the preferred mount of knights, with their massive weight of weaponry and armor. Ringo would've been fearsome in battle: His withers (where the neck meets the back) were a good foot above my head; his rump was three feet across. In all he seemed twice the stature of a normal horse.

The Budweiser Clydes are among the royalty of the breed, impeccably trained and devotedly tended. The company has four touring hitches that travel around the country giving shows — this batch lives in New Hampshire. The horses range in age from 5 to 14, with an average age of 8. On this frigid and blustery day, they each wore a red blanket with their logo, a bald eagle clambering through a big gold A.

In my opinion these horses are the best thing about Budweiser. And for this day they also were the best thing about lunch hour.

— Deb Burns, Acquiring Editor

Thursday, October 15, 2009

Sharon Bowers on Parents TV!


Showing off a variety of creepy and delicious treats from the pages of Ghoulish Goodies. I'm especially loving those worm cups!

Creamy Kale & Pumpkin Soup

Here's a delicious recipe for soup that's perfect for October, from the pages of Pumpkin by DeeDee Stovel.

Creamy Kale & Pumpkin Soup
Kale packs a nutritional wallop that is hard to beat. Pumpkin makes it even better. But the best part of this winter soup is its mild and smooth pumpkin potato flavor, spiked with a bitter hint of kale. Serve with a zesty sourdough bread for a wonderful winter lunch or supper.

Serves 6

3 slices bacon
1 tablespoon olive oil
1 medium onion, chopped (1 cup)
2 cloves garlic, minced
4 cups chicken broth, homemade if possible
2 medium new potatoes (about 3⁄4 pound), peeled and cut into 1-inch chunks
1⁄2 pound curly kale, stems and ribs removed, finely chopped
1⁄2 teaspoon salt
11⁄2 cups canned unsweetened pumpkin
1⁄4 teaspoon ground nutmeg
1⁄8 teaspoon white pepper
3⁄4 cup half-and-half

1 Cook the bacon over medium heat in a large Dutch oven until brown and crispy. Remove it from the pot, crumble, and set aside. Pour off all but about 1 teaspoon of the fat.

2 Heat the olive oil in the same pan and add the onion. Cook for about 5 minutes, stirring occasionally, until soft and onion starts to caramelize. Add the garlic and cook 1 minute longer.

3 Pour two cups of the broth into the pan and stir to loosen browned bits on bottom of pan. Add the potatoes, kale, and salt; bring to a boil, then reduce the heat and simmer for 20 to 25 minutes, until the potatoes are easily pierced with a fork and the kale is wilted.

4 Purรจe the potato mixture with a hand-held blender or in a standing blender. There will be flecks of green from the kale. Be careful not to let hot soup splatter on you. Return the soup to the pot.

5 Stir the remaining broth and the pumpkin, nutmeg, and pepper into the soup. Taste and adjust the seasonings, if desired. Add the half-and-half and heat through, but do not boil.

6 Sprinkle each steaming bowl with the reserved bacon and serve.

Photo by Melanie Jolicoeur

Wednesday, October 14, 2009

Paul Tukey: A Chemical Reaction


To the friends of A Chemical Reaction,

I wanted to pass along a bit of news out of the town of Hudson, as posted on our www.Safelawns.org/blog today:

Euphoric phone calls and emails poured out of Hudson, Quebec, this past week with word that Michael Elliott — the same man who shepherded North America’s first anti-pesticide bylaw all the way to the Supreme Court — was named mayor again after 16 years in retirement from town politics.

Elliott, who is a key figure in the documentary film, A Chemical Reaction, had hinted to us that he was considering running for the town’s top elected office. The filming of the movie, he said, made him realize he “had a lot of unfinished business.”

Ultimately, when Elliott announced he was running, no one else in the town of 5,200 stepped forward to oppose him. He earned the seat by acclimation.

That sets up an intriguing battle. The town’s three golf courses have been exempted from the town’s historic anti-pesticide bylaw that took effect in 1991 and many folks, Elliott included, have objected to the courses’ free ride with pesticides. Will the new/old sheriff take on this fight to make history a second time around? I wouldn’t bet against it.

ALSO,
After the sold-out Maine premiere last week, we were approached by a woman who declared that "everyone in North America needs to see this film and I want to help make that happen." To that end, she pledged a $10,000 matching grant, which means that for all donations we raise up to $10,000 in the next 60 days, she'll match them dollar for dollar. If we're successful with this campaign, we should be in position to release the DVD for sale by Christmas. Our web site is now set up for tax-deductible donations to the movie and we're well on our way with more than $1,600 in the past week alone. Among the donors has been Steve Kalafer, a three-time Academy Award nominated documentary director and producer who attended our New Jersey premiere. He said our film was one of the most "eye-opening, educational and compelling documentaries" he has seen this year. "I just never knew any of that stuff about lawns," he said, "and I'm sure the rest of America will have the same reaction . . . if they see the film."

SCREENINGS:
Sun Valley, Idaho, Oct. 17
Orlando, Fla., Nov. 5
Miami, Fla., Nov. 6
Ft. Lauderdale, Fla, Nov. 9
UMaine Orono, Nov. 12 (tentative)
Burlington, Vt., Nov. 18
Ottawa, Ontario, Dec. 3

I hope all is well with all of you and I'll keep in touch. If anyone wants details on screenings or donations, let me know.

Thanks!!

Paul Tukey

Paul Tukey is author of The Organic Lawn Care Manual, as well as the founding editor and publisher of People, Places & Plants magazine and cohost of the HGTV show by the same name. This self-confessed mowing addict is the American Horticultural Society’s Communicator of the Year for 2006. He also is the founder of and spokesman for Safe Lawns, a national awareness campaign to draw attention to emerging natural lawn care alternatives.

"Can You Hear Me?" vs "Are You Listening?"

Can you tell what's going on here? Pam Art (our president and publisher) and I are knitting a scarf — she's at one end, and I'm at the other. We're doing a charity contribution here at Storey for Keep The Fleece, an organization founded by the wonderful people at Wild Fibers magazine to benefit Heifer International. We asked our publishing community for donations, and for every $10 we receive, we knit an inch onto a scarf that will be exhibited (along with hundreds of others done by other knitting teams) at the New York Sheep and Wool Festival to be held in Rhinebeck, New York from October 16 through 18.

This scarf began in the middle, where another member of our staff, Gwen Steege, did an ingenious cast-on that enabled two people to knit at the same time. Pam and I, in the course of two back-to-back meetings one morning, knit almost three feet of scarf. It's kind of touchy to knit in meetings here, because some feel that if you're knitting, you're not concentrating on the meeting itself. I know that some classroom teachers feel this way, too. However, as the parent of two boys with attention issues (and really, what kid doesn't have attention issues these days?), I have done lots of research on this and found that doing something mindless with your hands often enables you to focus intensely with your brain, to absorb what's being said.

You know what else works? Chewing gum. This was passed on to me by a nurse at my pediatrician's office, and in doing some anecdotal research (i.e., asking parents in the school pickup line), I found that it's really true. Having a mindless task that is a learned muscle memory can help with attention, concentration, and executive function.

But mainly, Pam and I were simply enjoying ourselves.

Amy Greeman, Publicity Director

Tuesday, October 13, 2009

The Cheese Queen

This weekend I took a class with cheesemaker extraordinaire Ricki Carroll. Featured prominently in Barbara Kingsolver's best-selling book Animal, Vegetable, Miracle, she's become a celebrity in the culinary world and locavore movement. Wholly deserving the recognition, she's been making cheese since 1975 and has been in the business of selling home cheesemaking supplies since 1978. When she started, home cheesemaking was practically a lost art in this country, and goat farmers usually threw their goat's milk away for lack of any practical way to make cheese from it or sell it as an alternative to cow's milk. For decades she made a living bringing supplies to farmers and other country folk interested in self-sufficiency. With the booming interest in homemade food and traditional skills, she's now attracting a whole new audience of urban- and suburbanites.

Ricki is known as "The Cheese Queen," but 10 minutes into the class, my husband Mars leaned over to whisper, "She's like Willy Wonka," and he's dead-on (as always): Ricki is renowned, intense, passionate, and very serious about class etiquette. Each one of us hoped we were Charlie Bucket and not Augustus Gloop or Veruca Salt. She holds the classes in her large country home in Ashfield, Massachusetts; eccentrically painted in bright colors, the house is a welcome statement of individuality amidst staid New England colors. Her home is also artistically decorated: antique chairs with lion-head armrests, African fabrics, and custom furniture by Richard Dunbrack that looks like it popped out of the surrealist classic The Cabinet of Dr. Caligari.

The practicum of the class was making a hard cheddar cheese, though in the lulls we watched Ricki demonstrate how to make simpler cheeses — mascarpone, mozzarella, ricotta, and queso blanco, for example — as well as dairy products such as yoghurt and crรจme fraรฎche.

Adding the mesophilic culture to the milk

Cutting the curds

Gently moving the cut curds around to release the whey;
we were instructed to handle them like a baby.


Heating and further separating the curds and whey.
You need a thermometer to make sure the temperature rises
at the correct rate . . . 2°F every five minutes.


Straining the curd ball through cheesecloth
and catching the whey in a basin below


Breaking the curd ball into chunks

The chunks go into a cheese press to further
remove the whey and give the cheese shape.

During the seven hours of the class I realized that cheesemaking is more akin to chemistry and science than cooking. I'm hooked on the taste and bought the supplies to make my own ricotta, mozzarella, and yoghurt, which are reputedly easy. If you have a hankering to try it yourself, Ricki's site for selling supplies is www.cheesemaking.com, and Storey publishes her book Home Cheese Making, available from booksellers everywhere.

Alethea Morrison, Creative Director
All photos by Mars Vilaubi

LinkWithin